Setting up tenants
Creating tenants requires planning your organizational structure and understanding what each group of users should be able to do. This chapter walks through practical approaches to tenant design.
Planning your tenant structure
Start by identifying the groups that need separated workspaces. Common patterns:
Organizational hierarchy: Sysadmins, managers, and departments each get their own tenant. This separates technical operations from business administration from daily work.
Business units: Marketing, Sales, Engineering, Operations each get a tenant. They share some resources (company-wide agents) but have unit-specific agents.
Customer isolation: Each customer gets their own tenant. Useful for service providers or SaaS deployments where customers must never see each other's data or agents.
Environment separation: Development, staging, and production run as separate tenants. Developers can experiment in the dev tenant without affecting production users.
Compliance boundaries: Legal requirements might mandate separation between entities, geographic regions, or data classifications. Each regulated boundary becomes a tenant.
The three-level pattern
Most deployments benefit from three levels of tenants:
Level 1: System administration
Create a tenant for people who maintain the platform infrastructure. These users:
- Deploy agent and process code to the platform
- Configure data pipelines for ingesting documents
- Manage platform services and monitoring
- Have full access to all platform capabilities
This is typically 2-5 people: your DevOps team, lead developers, or IT staff responsible for the platform.
Level 2: Business administration
Create a tenant for people who administer the platform for business users. These users:
- Create and configure new tenants
- Add users to tenants and assign roles
- Create agent instances from deployed classes
- Monitor agent performance and run evaluations
- Manage knowledge databases (view ingestion status, troubleshoot issues)
These are business analysts, project managers, or department heads who understand the organization's needs but don't write code.
In the current implementation, creating and configuring tenants (Step 1–3 below) requires the
AIHubSysAdminrealm role. Grant it to the people who fill this Level 2 role so they can run the tenant lifecycle; the remaining Level 2 activities (agent instances, evaluations, knowledge) are ordinary in-tenant admin tasks.
Level 3: End users
Create tenants for people who use agents to accomplish work. These users:
- Chat with agents relevant to their role
- Participate in processes that involve their department
- Cannot see administrative interfaces or create agent instances
This is everyone else in your organization.
Creating a tenant
A tenant lives in two stores: a Keycloak group under /tenants/<id> (the source of truth for the tenant's existence and membership) and the platform's own metadata store (display name, description, access rules). Creating a tenant therefore means first creating the Keycloak group, then attaching metadata to it from the Tenant Administration UI. The order matters — you cannot configure a tenant whose Keycloak group does not yet exist.
Required role: AIHubSysAdmin
Tenant administration is gated by the AIHubSysAdmin Keycloak realm role. Only users carrying this realm role see the Tenant Administration entry points and can reach the create/configure flow. A regular tenant admin role (e.g. AIHubAdmin) is not sufficient — that role administers within a tenant, not the tenant lifecycle itself.
Step 1 — Create the Keycloak group (prerequisite)
Open the Keycloak admin console, switch to the Swiss AI-Hub (aihub) realm, and go to Groups → tenants. On the Child groups tab, click Create group and give it the tenant's ID — for example finance. This creates the group /tenants/finance.
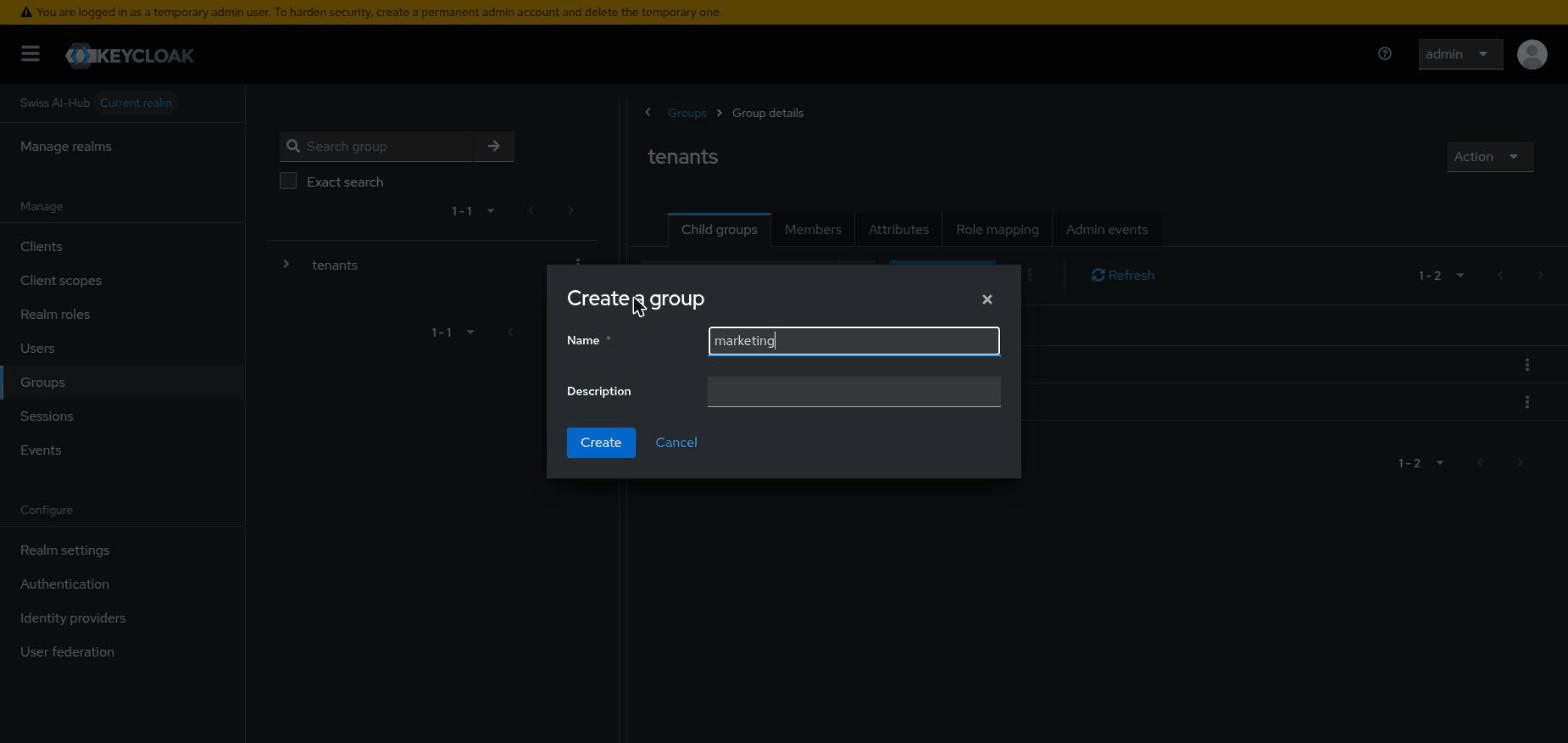
The group ID becomes the tenant's immutable identifier. Use a short, lowercase, URL-safe slug (finance, acme-corp, production); the human-readable display name is set later as metadata.
Tenant groups are also created automatically by IDP-to-tenant mappings (see IDP-based tenant assignment). Those groups arrive Unconfigured and show up in exactly the same configure flow described below.
Step 2 — Open Tenant Administration
Tenant Administration is a separate, sysadmin-only application served at sysadmin.<your-domain> (in local development: http://localhost:3334). You do not need to type that URL — reach it from the main app in one of two ways:
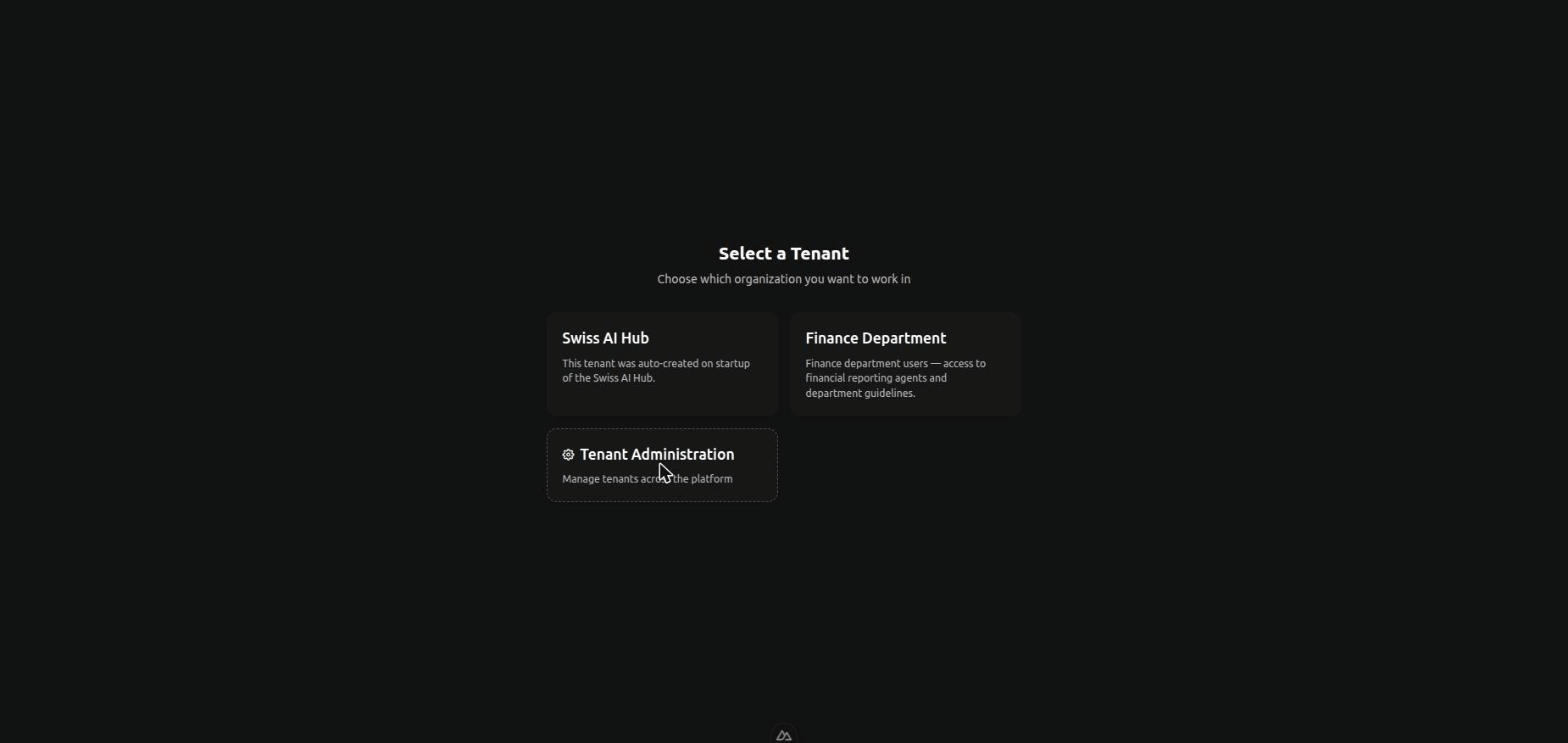
- Tenant switcher in the top bar → Tenant Administration (shown only to
AIHubSysAdminusers), or - the Tenant Administration card on the tenant-selection screen (
/select-tenant).
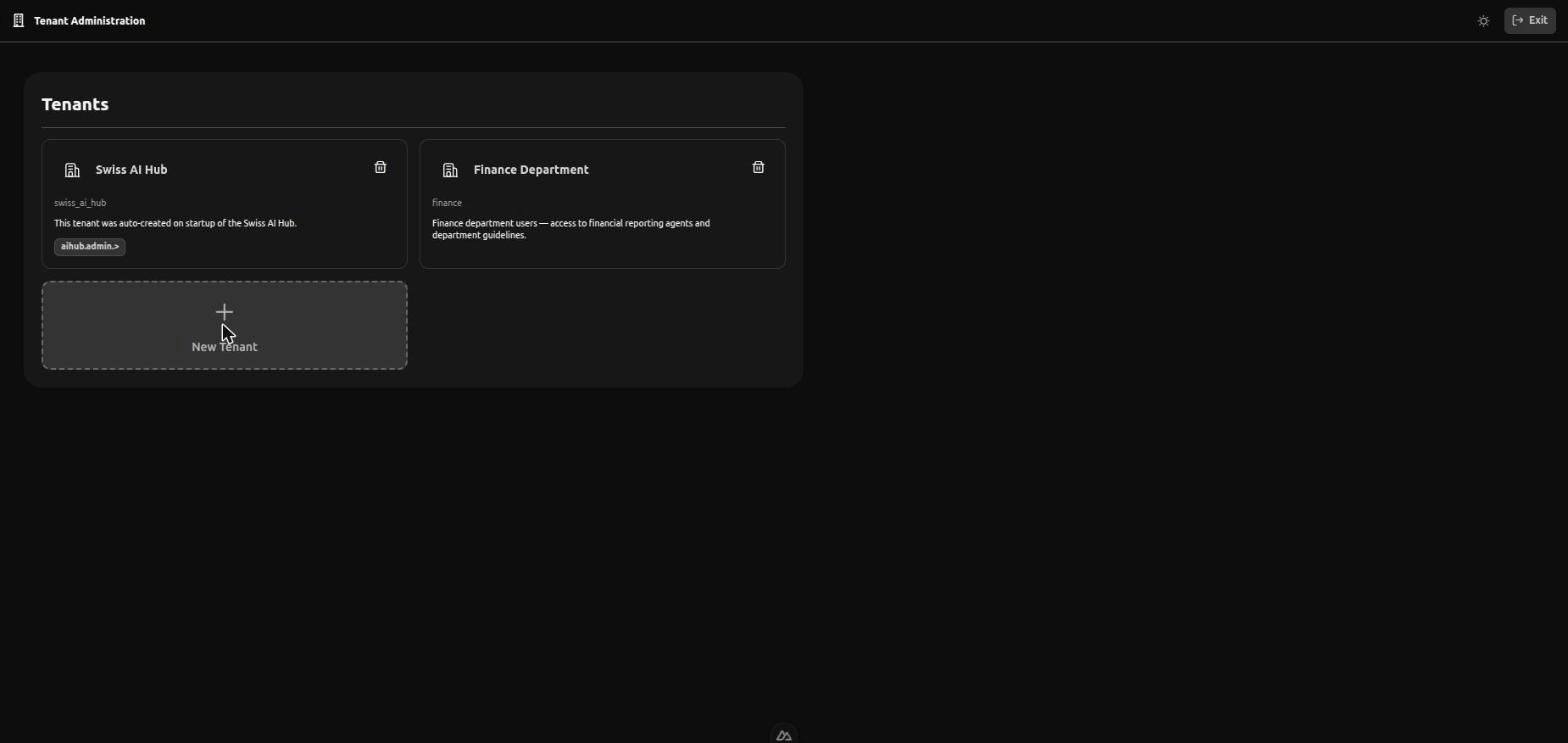
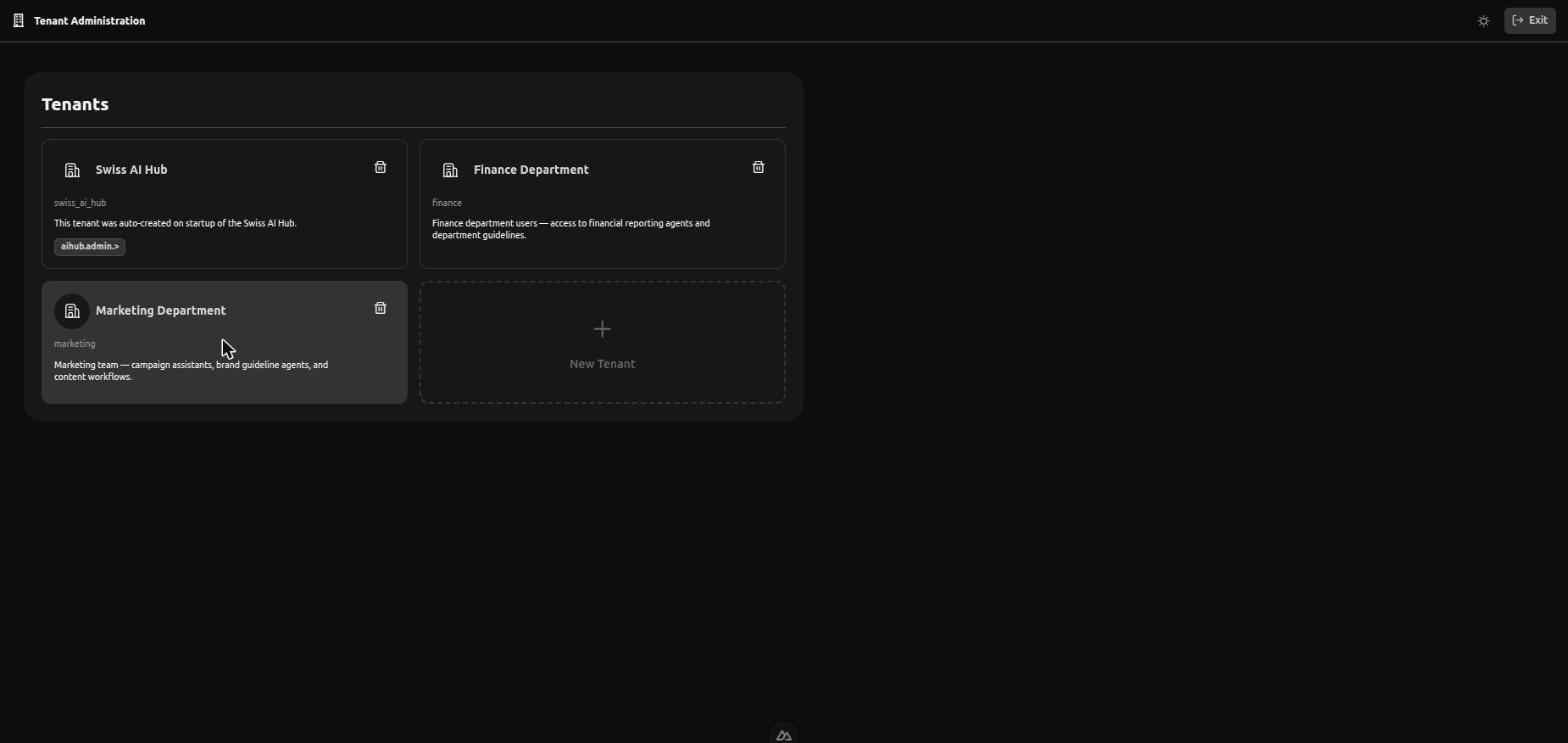
Both land you on the Tenants page (/tenants), which lists every tenant and its state (Active, Orphaned, Unconfigured — see Tenant states).
Step 3 — Configure the tenant
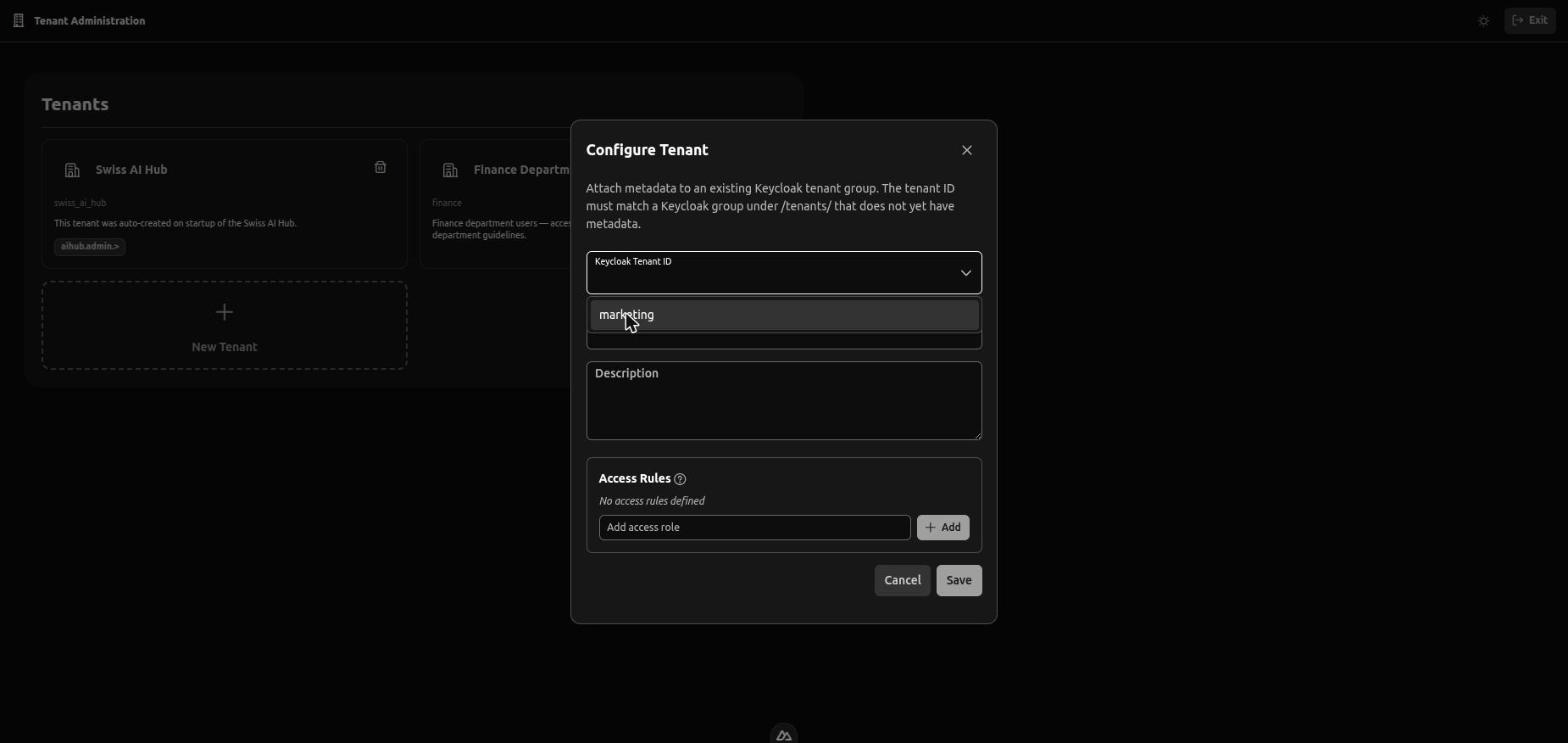
On the Tenants page, click the dashed New Tenant card. (If the card is disabled, there are no unconfigured Keycloak groups yet — go back to Step 1.) The Configure Tenant dialog attaches metadata to your Keycloak group:
- Keycloak Tenant ID — a dropdown of Keycloak groups under
/tenants/that do not yet have metadata. Select the group you created in Step 1 (e.g.finance). - Tenant Name — the human-readable display name users see when selecting a tenant ("Finance Department", "Customer — Acme Corp", "Production"). Must be unique.
- Description — what the tenant is for. Helps current and future administrators understand its purpose.
- Access Rules — optional rules that define the maximum scope for everyone in the tenant (see Scoping tenants). You can leave this empty and refine it later.
Click Save. The platform seeds the tenant's default roles, adds the current sysadmin to the tenant, and writes the metadata. The tenant immediately becomes Active and is selectable by its members.
There is no separate "Scope" field on the create form. Tenant boundaries are expressed through Access Rules, which you can set at creation time or edit later from the tenant's Overview tab.
Scoping tenants
A tenant's access rules (the Access Rules field on the configure form, editable later from the Overview tab) determine the maximum access anyone in that tenant can have. Think of them as drawing a boundary around resources.
For a Finance department tenant, you might scope it to:
- Finance-related agents (reporting agents, guideline agents, approval workflows)
- Finance knowledge databases (for managers who troubleshoot ingestion issues)
- Specific processes (budget approval workflow, expense reporting)
A user in the Finance tenant cannot access HR agents even if you give them an admin role within Finance tenant. The tenant boundary prevents it.
Starting broad vs starting narrow
You have two approaches:
Broad scope: Give the tenant access to everything initially. Users can see all agents, all services, all processes. As you learn what they actually need, narrow the scope by removing access to unused resources.
Narrow scope: Give the tenant access only to specific resources. As users request more capabilities, expand the scope gradually.
Broad scope is easier initially but requires more cleanup later. Narrow scope is more secure but users will request access as they discover needs.
For end-user tenants (departments, customers), start narrow. These users don't need wide visibility - they need specific tools. For management tenants, start broad since these users need flexibility to administer the platform.
Configuring roles within tenants
Saving a new tenant seeds a set of default roles automatically, so the tenant is usable immediately. To review or extend them, open the tenant from the Tenants list and switch to its Roles tab (/tenants/<id>/roles). Roles define what users can do within the tenant's boundaries; each role carries its own access rules, bounded by the tenant's.
For a department tenant, you might add:
Standard User: Can chat with department agents, participate in processes, but cannot create or modify anything.
Team Lead: Can create agent instances, configure agents for their team, view evaluation results, but cannot manage users or change tenant settings.
Department Admin: Full control within the department tenant - can add users, assign roles, create agents, and manage all department resources.
These roles only apply within this tenant. A user who is "Department Admin" in Finance has no privileges in the HR tenant unless explicitly granted.
Assigning roles to users
Open the tenant and switch to its Users tab (/tenants/<id>/users). It lists the users known to the platform; for each one you assign or revoke that tenant's roles.
User lifecycle — creating accounts, deleting them, federating from an external identity provider — is managed in Keycloak, not here. A user becomes a tenant member through Keycloak group membership (the /tenants/<id> group), which is also how IDP-based mappings add users automatically. The Users tab is where you grant those members their in-tenant roles.
Users can belong to multiple tenants. Someone might be:
- Standard user in their department tenant
- Team lead in a cross-functional project tenant
- Admin in a test tenant for trying out new features
Startup tenant behavior
When someone logs in for the first time, they automatically join the startup tenant (the one the platform seeded on first boot — see AIHUB_STARTUP_TENANT_*) with standard user roles. Configure this behavior with environment variables:
AIHUB_USER_SIGNUP_DEFAULT_TENANT="default"
AIHUB_USER_SIGNUP_DEFAULT_ROLES="AIHubUser"
FIRST_AIHUB_USER_SIGNUP_DEFAULT_ROLES="AIHubAdmin"
The first person to sign in receives admin roles, ensuring someone can administer the platform immediately. Subsequent users receive standard roles.
This automatic assignment only happens once per user. After that, explicitly add them to other tenants as needed.
Common configurations
Single company with departments
Sysadmin tenant → Management tenant → One tenant per department
Managers create department tenants and configure which agents each department can access. Department users only see their department's resources.
Multi-customer SaaS
Sysadmin tenant → Management tenant → One tenant per customer
Each customer tenant is isolated. Customers cannot see other customers' agents or data. Managers onboard new customers by creating a tenant, configuring relevant agents, and adding that customer's users.
Consulting organization
Sysadmin tenant → Management tenant → One tenant per client project
Project tenants give consultants access to client-specific agents and knowledge. When a project ends, archive the tenant. When a consultant joins a new project, add them to that project's tenant.
Development workflow
Sysadmin tenant → Dev tenant → Staging tenant → Production tenant
Developers work in dev tenant with relaxed controls. Staging tenant mirrors production for testing. Production tenant has strict access controls. Same agents, same code, different tenants for different purposes.
Tenant states
Because tenants live in two stores — Keycloak (group under /tenants/<id>, the source of truth for existence) and the platform's own metadata store (display name, description, access rules) — they can be observed in three states:
- Active: both the Keycloak group and the metadata are present. End users can reach the tenant.
- Orphaned: metadata is present but the Keycloak group is gone (e.g. an operator removed the group out of band). End users cannot reach the tenant. Sysadmins see it as read-only with a delete-metadata action only.
- Unconfigured: the Keycloak group exists but no metadata has been attached. End users cannot reach the tenant yet. Sysadmins see it in the "configure tenant" flow, where attaching metadata promotes it to Active.
The Tenant Administration app (sysadmin.<your-domain>, route /tenants) surfaces all three states. The configure-tenant action attaches metadata to an Unconfigured group and is the primary path through which an operator-created Keycloak group (e.g. for an IDP-to-tenant mapping) becomes a usable tenant.
Tenant lifecycle
Tenants persist until explicitly deleted. You can:
Archive a tenant: Remove all users but keep the tenant and its roles. Useful for completed projects or inactive customers. No one can access it but the configuration remains if you need to reactivate it.
Delete a tenant: Remove the platform's metadata for the tenant. The Keycloak group itself is left untouched — cleanup of the group is a separate step in the Keycloak admin console. Deletion is permanent on the metadata side.
Last-Tenant Protection
The platform requires at least one tenant to remain. Deletion is blocked when it would leave the system with no remaining tenants. Any tenant — including the one the platform seeded on first boot — can be deleted as long as at least one other tenant exists. The startup tenant carries no database-level marker that distinguishes it from tenants configured later.
Practical tips
Best Practices
Document your decisions: Write down why you created each tenant and what its scope should be. Six months later when roles have changed, this documentation prevents confusion.
Start simple: One management tenant and one end-user tenant works for many organizations. Add complexity only when you need it.
Test with restricted users: Create a test account, add it to a new tenant, and verify what that user can see. Don't assume - verify.
Review quarterly: People change roles. Projects end. New departments form. Your tenant structure should evolve with your organization.
Plan for growth: "Customer 1" works when you have three customers. "Customer - Acme Corp" works when you have three hundred.